« Back to Knowledge Base

Sending and receiving between vMix and ProPresenter using NDI
You can both send the vMix Output to ProPresenter as well as receive the Output from ProPresenter to vMix by using NDI.
Requirements
- ProPresenter 6 with the NDI/SDI Module added. (Optionally also the Alpha Key Module if you would like to use an alpha channel over NDI).
Or ProPresenter 7 and above. - vMix version 17 or higher
For this knowledge base guide demonstration we will be using ProPresenter 7 which already has NDI capabilities built into it.
Sending from vMix to ProPresenter (ProPresenter 7 only)
Step 1
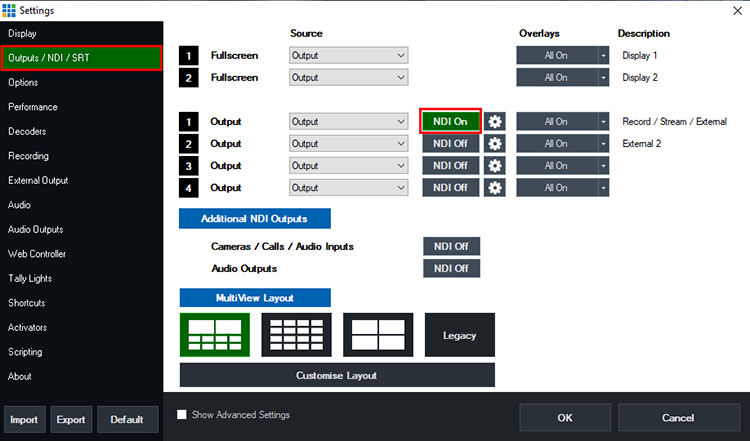
Open vMix and load your vMix preset ready to go for your production. Go to Settings (top right) and select the Outputs/NDI/SRT tab.
Next to Output 1, tick the NDI button so it is green and says NDI On. Then Press OK.
Step 2
Next go to ProPresenter. (We recommend running ProPresenter on a second computer for best performance. Just make sure it is connected to the same local network as the vMix computer).
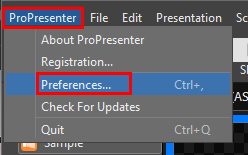
Go to the ProPresenter menu up the top left and select Preferences.
Step 3
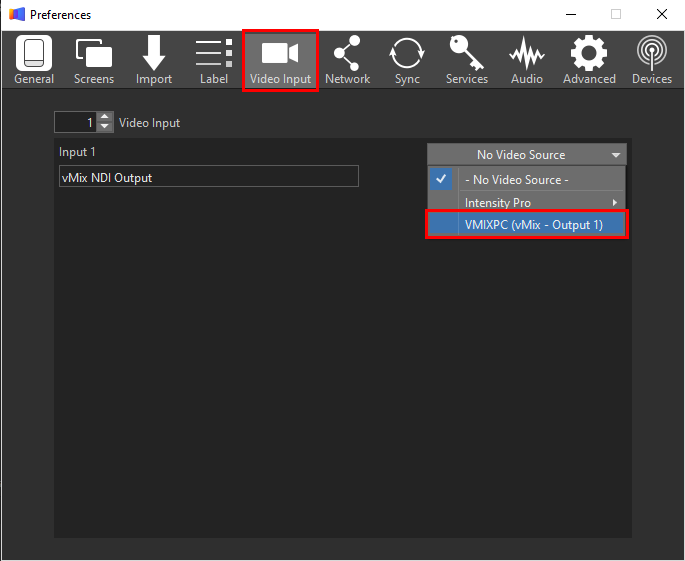
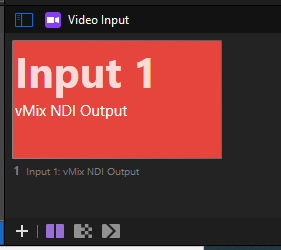
Select the Video Input tab. From the dropdown menu to the right, select the vMix NDI Output option. It will have your computer name followed by vMix - Output 1. EG. YOURPCNAME - (vMix - Output 1). Give your input a name in the field to the left to help you identify it. Close this window.
Step 4
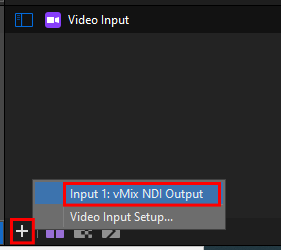
Down the bottom left of ProPresenter is the Video Input section. Click the plus icon and select the Video Input option we have just added.This will now appear in your Video Inputs section. You can then choose to send it to your screens or use it within your ProPresenter production how you wish.
Sending from ProPresenter to vMix
Step 1
Open ProPresenter than select the ProPresenter menu up the top left and choose Preferences.
Step 2
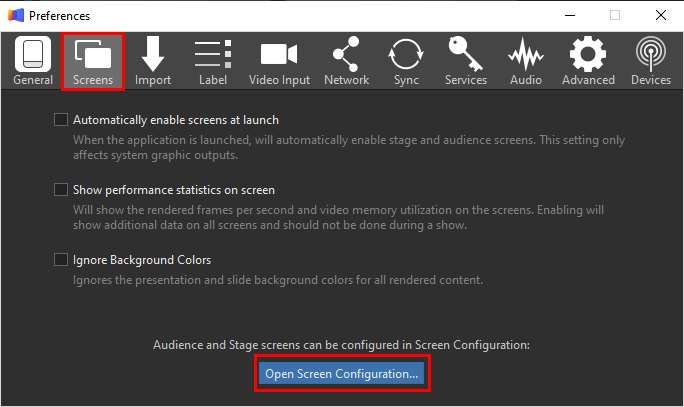
Select the Screens tab. Then click the Open Screen Configuration button down the bottom.Step 3
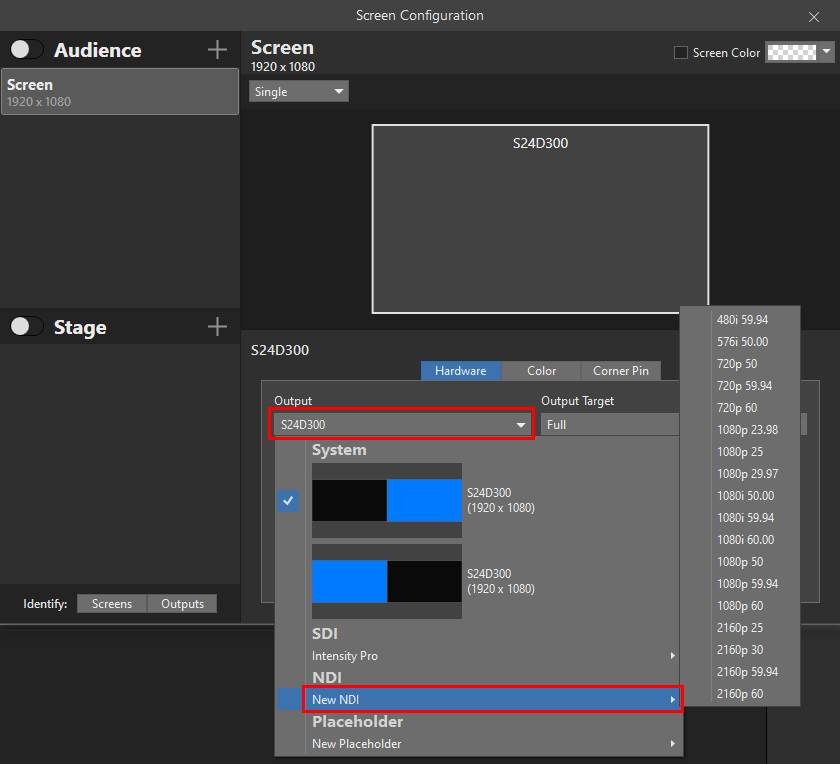
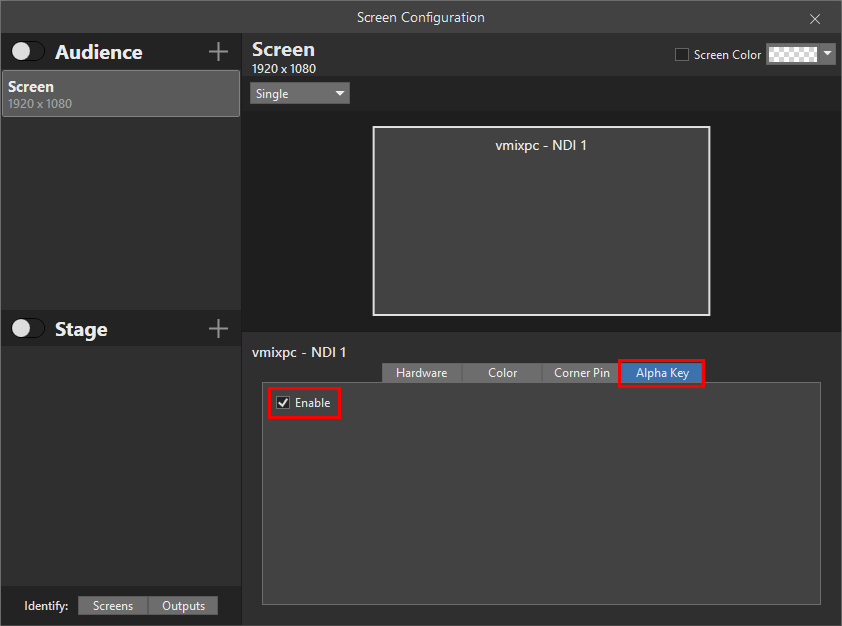
Down the bottom of this window in the Hardware tab section is a dropdown menu underneath Output. Select this and choose the New NDI option and select the resolution and frame rate setting you would like. This will generally be the same resolution and frame rate as your vMix production.Once that is selected, you will see it show up down the bottom. Its name will be the computer name followed by - NDI 1 or 2 etc. Eg. yourpcname - NDI 1.
If you would like your NDI output from ProPresenter to include an alpha channel (transparency), then from this same window, select the Alpha Key tab. Then tick the checkbox Enable.
This is useful if you would like to send any song lyrics or scripture that is on a transparent background to vMix so you can use it as an overlay in your vMix production. Once that is all set up, close this window.
Step 4
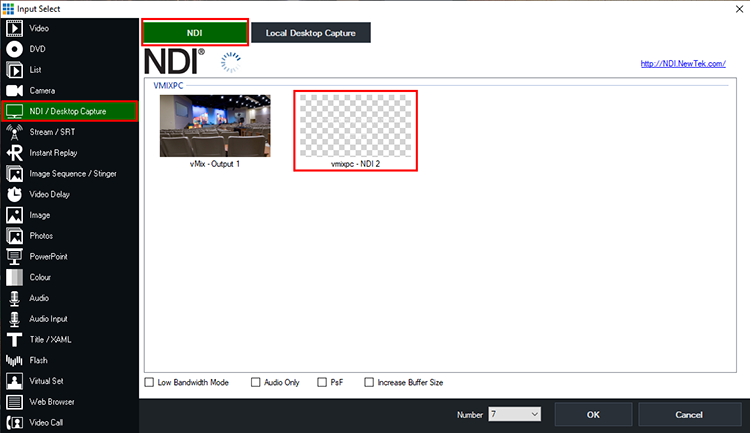
Next, go to your vMix computer and open up vMix. Select the Add Input menu button at the bottom left. Then choose the NDI/Desktop Capture tab. Then select the NDI option up the top.
From here you should see the option to select the NDI Output being sent from ProPresenter. Click this and press OK to add to vMix.
From here you should see the option to select the NDI Output being sent from ProPresenter. Click this and press OK to add to vMix.
Step 5
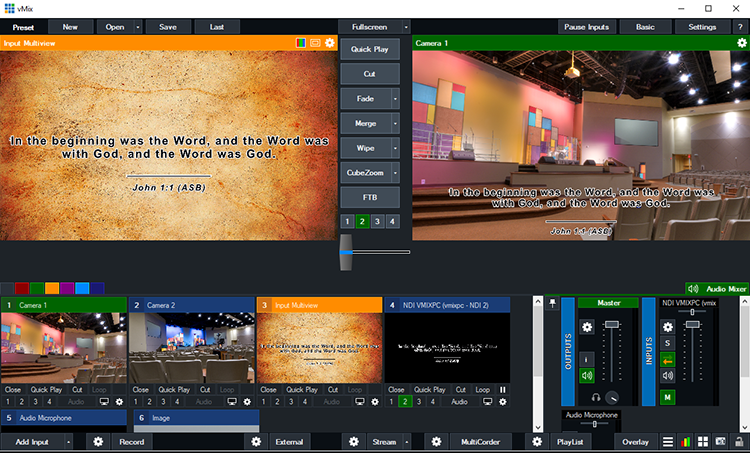
You can now either use this as a separate input in vMix to switch to in your production. Or if it has a transparent background, you can position and overlay it over the top of your vMix production.
Last Updated: Tuesday, April 14, 2020 9:08:51 AM